After Photo
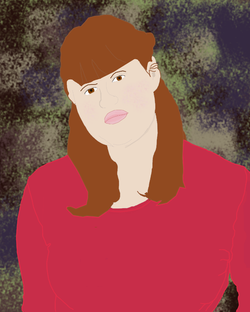
This is the final product. I think it turned out okay, but in this picture I look mad and my hair could have been better. First I had to create a white layer, and after that I had to outline the whole thing. For this one I decided to outline the photo with colors similar to the actual colors of the shirt, skin, hair, and facial features. To create the shirt, skin, hair and facial features colors I basically used the eyedropper and the paint brush to fill in these areas. I ended up using the eraser tool a lot in this project. because there are things that are overlapping and you can not have the skin overlapping the shirt in spots where it shouldn't be. So I had to create single layer for each individual item. The background was my favorite. I had to create another layer and I put a base coat of color down then I used the galaxy tools to create the sponge texture.
